
WordPress WebP Images: The Complete Optimization Guide for 2026
Author
Muhammad Awais
Published
May 25, 2026
Reading Time
10 min read
Views
10.6k
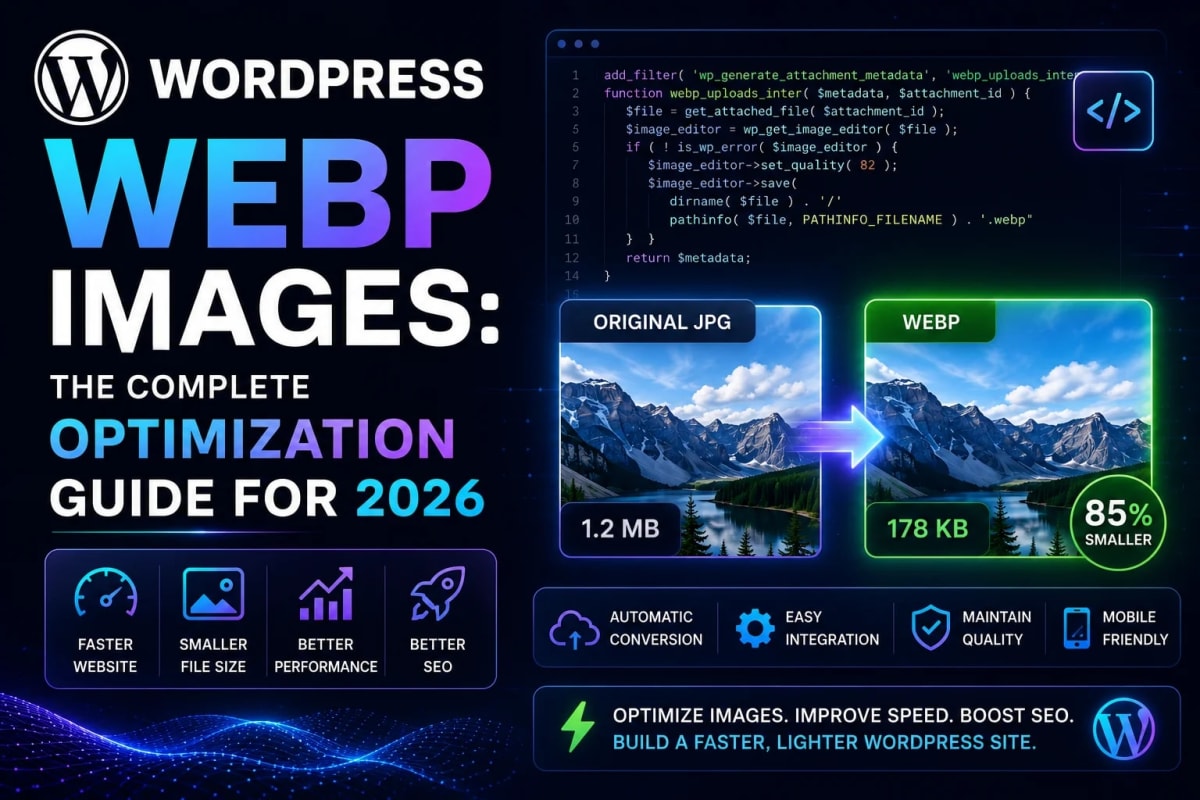
WordPress Still Doesn't Serve WebP by Default in 2026 - Here's the Fix
I inherited a WordPress WooCommerce site last year. Good products, decent traffic, terrible performance. Lighthouse score was 38. The biggest line item in the audit wasn't render-blocking scripts or unused CSS it was images. Every single product photo was a JPEG between 600KB and 1.4MB, served without any format optimization whatsoever.
The client had assumed WordPress handled image optimization automatically. It doesn't. Even in 2026, a fresh WordPress installation with Gutenberg will happily accept a 3MB JPEG, store it as-is, and serve it to every visitor with zero conversion to WebP. The responsibility is entirely on you either through a plugin, a hosting-level solution, or converting before upload.
After testing four different approaches on that site, the Lighthouse score went from 38 to 74. Image payload per page dropped from 11MB to under 2MB. This guide covers what actually worked and what didn't.
What you'll learn: Why WordPress doesn't auto-convert images to WebP by default
The pre-upload method that works regardless of hosting or plugins
Which plugins genuinely convert to WebP vs which just add overhead
How to handle existing media library images that are already uploaded as JPEG or PNG
The hosting-level solution that beats everything else if you have the right provider
Why WordPress Doesn't Handle This Automatically
WordPress has supported WebP uploads since version 5.8 (released July 2021). You can upload a WebP file to your media library and use it in posts. What WordPress doesn't do is automatically convert JPEG or PNG uploads to WebP that conversion step simply isn't part of the core upload pipeline.
There's a long-running debate in the WordPress development community about whether automatic conversion should be built into core. The concern is that lossless WebP conversion for certain image types can produce larger files than the original, and WordPress core tries to avoid making decisions that could break edge cases for the long tail of sites and hosting configurations it runs on.
The result: WebP optimization in WordPress is a third-party concern. You handle it either before images reach WordPress (pre-upload conversion), at the plugin layer (a WebP conversion plugin processes images after upload), or at the server/CDN layer (your hosting converts on delivery).
Each approach has real trade-offs that most comparison articles gloss over. Let's go through them honestly.
Method 1: Pre-Upload Conversion The Simplest and Most Reliable Approach
This is what I now recommend to every WordPress client as the baseline approach, regardless of what else they're doing. Before any image touches the WordPress media library, convert it to WebP. The converted file is what gets uploaded WordPress stores WebP natively and serves it directly.
The practical workflow: take your batch of product photos or blog images, run them through a converter, download the WebP versions, then upload to WordPress. The entire media library stays clean no duplicate format storage, no plugin overhead on page load, no conversion happening at upload time that slows down the admin panel.
Our Image to WebP Converter handles batches of up to 25 images at once drop your files, set quality to 85% for photos or 90% for UI screenshots, download the ZIP, and upload to WordPress. Everything runs in your browser so no images are uploaded to any third-party server, which matters when you're handling client content or proprietary product photos.
The one limitation of this approach: it doesn't help with images already sitting in your media library as JPEGs. For those, you need one of the plugin approaches below or a manual regeneration process.
Method 2: Plugins That Actually Work - And the Ones to Avoid
There are dozens of WordPress image optimization plugins. Most of them are cloud-based they upload your images to a remote server, convert them, and send back the result. This works, but it means your images leave your server, you're dependent on the plugin service staying operational, and you often hit conversion limits on free tiers.
Here's my honest assessment of the main options in 2026:
Imagify: Converts to WebP on upload and serves via a
<picture>element with WebP and original format fallback. The free tier handles 20MB per month enough for a small blog but not an active WooCommerce store. The paid tier is reasonable at around $4.99/month. The plugin adds a small overhead to every page load for the<picture>element rewriting, but it's minimal. This is the one I've used most reliably in production.ShortPixel: Similar cloud-based approach. 100 image credits free per month, then paid credits. Supports WebP and AVIF output. The credit system is confusing each image size WordPress generates (thumbnail, medium, large, full) counts as a separate credit, so a single upload can consume 4-5 credits. For sites with large media libraries, costs add up faster than you'd expect.
Smush (WPMU DEV): The free version does basic compression but WebP conversion requires the paid Pro version. The marketing around the free tier is misleading most users install it expecting WebP output and discover the limitation after the fact. Skip the free version if WebP is your goal.
WebP Express: A free plugin that does local server-side WebP conversion without cloud processing. It requires your server to have the
libwebplibrary or certain PHP extensions available. Works well on properly configured hosting but fails silently on shared hosts that don't have the dependencies. If it works on your server, it's the best free option because there are no external service dependencies.
My recommendation: if you're starting fresh, use the pre-upload method for new images and Imagify (paid) to retroactively convert existing media library images. If budget is a constraint, WebP Express is worth trying first just verify it's actually working by checking the Network tab in DevTools.
Method 3: Hosting-Level WebP - The Best Solution You Might Already Have
Several managed WordPress hosts offer WebP conversion at the CDN or server layer. According to Cloudflare's Polish documentation, automatic WebP conversion is available on all Cloudflare plans including the free tier, completely outside of WordPress and its plugin ecosystem. This is architecturally the cleanest solution no plugins, no admin overhead, and conversion happens transparently for every image on your site including those already in the media library.
Cloudflare Polish: If your site sits behind Cloudflare (free tier included), the Polish feature automatically converts images to WebP for browsers that support it. Enable it in your Cloudflare dashboard under Speed → Optimization → Polish. It works on all images served through Cloudflare, regardless of whether they're in WordPress or static files. The "Lossless" setting preserves quality; "Lossy" gives larger size reductions. This is what I'd use if the client's site is already on Cloudflare.
Cloudinary: If you're using Cloudinary as your WordPress media library (via the Cloudinary plugin), you get automatic format optimization for free. Append f_auto,q_auto to any image URL and Cloudinary serves WebP to supporting browsers and JPEG to everything else. No plugin overhead, no WordPress involvement.
WP Engine, Kinsta, Flywheel: Most premium managed WordPress hosts include CDN-level image optimization with WebP support as part of their plans. If you're already paying for managed hosting, check whether image optimization is available in your dashboard before paying for a plugin that duplicates the functionality.
The Core Web Vitals impact of getting this right is significant. If you want to understand exactly how image format choices affect your LCP and overall Lighthouse score, our guide on fixing Core Web Vitals and page speed in 2026 covers the performance picture.
Converting Your Existing Media Library to WebP
If you've been running WordPress for a while, your media library is probably full of JPEGs and PNGs uploaded before you started thinking about WebP. Fixing these retroactively is more work than the pre-upload approach but it's necessary if your existing pages are the ones getting traffic.
The plugin approach is the most practical here. Imagify and ShortPixel both offer bulk conversion features you run them once against your existing media library and they convert every stored image size (thumbnail, medium, large, full) to WebP. After conversion, the plugins rewrite image output in WordPress to serve WebP to supporting browsers via <picture> elements automatically.
For a media library with thousands of images, bulk conversion can take significant time and use a lot of API credits. An alternative for technical users: export your images, run them through a batch converter locally, and re-import. This is time-consuming but avoids per-image API costs.
One thing to watch: WordPress generates multiple sizes of every uploaded image. When you upload a 2000×1500 JPEG, WordPress stores the original plus thumbnail (150×150), medium (300×225), medium-large (768×576), and large (1024×768) versions sometimes more depending on your theme. A plugin converting your media library converts all of these. A manual approach would need to account for each size too.
After converting, always check a few pages in the browser DevTools Network tab filter by Img and verify you're seeing Content-Type: image/webp in the response headers. If you're still seeing image/jpeg, either the conversion didn't complete or the plugin isn't rewriting the output correctly for that template.
Why PNG Images in WordPress Need Different Treatment
Most WordPress optimization guides focus on JPEG because it's the most common format for photos. But PNG images UI screenshots, product images with transparent backgrounds, infographics have their own optimization path that's worth addressing separately.
The key difference is transparency. If a PNG has a transparent background and you convert it to lossy WebP at 80% quality, the transparency is preserved but there may be color fringing around edges in some converters. For transparent PNGs, always preview the converted result on a dark background before using it in production.
For PNG images that don't need transparency screenshots, charts, diagrams treat them the same as JPEGs. Convert to WebP at 85-90% quality before upload (higher than JPEG because PNG source files often contain text and sharp edges that need more careful compression). Our complete guide to PNG to WebP conversion covers the edge cases in detail, including the transparency gotcha that trips up most developers.
Verifying WebP Is Actually Working on Your WordPress Site
This step gets skipped constantly, and it leads to the frustrating situation of having a WebP plugin installed but still failing Google's image format audit. Here's how to verify properly:
Open your WordPress site in Chrome: Right-click on any image and select "Open image in new tab." Check the URL and file extension in the address bar you might see
.jpgin the URL even when WebP is being served, because the plugin serves WebP transparently viaAcceptheader negotiation.Check DevTools Network tab: Open DevTools (F12), go to Network, filter by Img, reload the page. Click any image request. Under Response Headers, look for
Content-Type: image/webp. This is the definitive check if you seeimage/jpeg, WebP isn't being served for that image.Run Lighthouse in production: Not in WordPress admin, not on localhost on your actual live URL. The "Serve images in next-gen formats" audit flags every image still being served as JPEG or PNG with the potential savings per image. If WebP is working correctly, this audit should show no flagged images or dramatically smaller potential savings.
A common gotcha: caching plugins can serve cached versions of pages that were generated before WebP conversion was enabled. After enabling any WebP solution, clear all caches your hosting cache, any caching plugins, and Cloudflare cache if applicable before testing.
Common WordPress WebP Mistakes
Installing a WebP plugin and assuming it's working without verifying: Many plugins install without error even when server dependencies are missing. Always check DevTools after installation don't assume the plugin is doing its job because it activated without errors.
Forgetting to clear caches after enabling WebP: Your hosting cache, W3 Total Cache, WP Super Cache, WP Rocket all of these need to be cleared after you enable WebP conversion. Otherwise your visitors keep getting cached JPEG responses.
Using a cloud conversion plugin for sensitive client images: If you're running a membership site, legal firm, medical practice, or any site with sensitive imagery uploading images to a third-party cloud conversion service may conflict with your privacy obligations. Use pre-upload local conversion or a server-side solution like WebP Express instead.
Not configuring WordPress thumbnail sizes: Every image format you don't explicitly set as WebP in your plugin settings may still generate JPEG thumbnails. Check that your WebP plugin is configured to convert all registered image sizes, not just the full-size image.
Frequently Asked Questions
Does WordPress support WebP natively in 2026?
WordPress has supported WebP uploads since version 5.8 you can upload WebP files and use them in posts and pages. However, WordPress does not automatically convert JPEG or PNG images to WebP when you upload them. That conversion requires either a plugin, pre-upload conversion before images reach WordPress, or a CDN/hosting layer solution like Cloudflare Polish.
What is the best free plugin for WordPress WebP conversion?
WebP Express is the best fully free option it does local server-side conversion without cloud processing or API limits. However, it requires your server to have specific PHP extensions or the libwebp library installed, which isn't available on all shared hosting plans. If WebP Express doesn't work on your host, Imagify's free tier (20MB/month) or ShortPixel's free credits (100/month) are the next options, though both have limits that may not cover active sites.
How do I check if WebP is actually being served on my WordPress site?
Open Chrome DevTools (F12), go to the Network tab, filter by Img, and reload your page. Click any image request and look at the Response Headers you should see Content-Type: image/webp. If you see image/jpeg or image/png, WebP is not being served for that image regardless of what plugin you have installed. Also clear all caches before testing, as cached pages may show old image format responses.
Can I convert my entire existing WordPress media library to WebP?
Yes. Plugins like Imagify and ShortPixel offer bulk conversion features that process your existing media library images. They convert all registered image sizes thumbnails, medium, large, and full to WebP and then rewrite WordPress image output to serve the WebP versions to supporting browsers. For large media libraries, bulk conversion can take time and consume API credits, so check your plan limits before running it.
Does WebP conversion affect image quality in WordPress?
At quality settings of 80-85%, WebP images look visually identical to their JPEG originals at normal viewing sizes. The compression algorithm discards image data the human visual system is least sensitive to subtle color variations and micro-noise while preserving sharpness and color accuracy. For screenshots and images with text, use 88-92% quality to maintain legibility. You can verify quality by comparing original and converted images side-by-side using the before/after comparison in our Image to WebP Converter.
Is Cloudflare Polish the best WebP solution for WordPress?
For sites already using Cloudflare, Polish is arguably the cleanest solution it converts images at the CDN layer without any WordPress plugin overhead, works retroactively on all existing images, and requires no changes to your WordPress installation. The free Cloudflare plan includes Polish with basic lossy compression. The main limitation is that Polish only works for traffic routed through Cloudflare direct server requests bypass it. If your site isn't on Cloudflare, a plugin-based approach or pre-upload conversion are the practical alternatives.
Tagged in
Continue Reading
All Articles


Level Up Your Workflow
Free tools mentioned in this article
Image to WebP Converter
Convert up to 25 JPG, PNG, TIFF and BMP images to WebP with live before/after preview, smart resizing, and real-time savings metrics 100% client-side, nothing uploaded.
QR Code Generator
Generate custom QR codes for URLs, WiFi, WhatsApp, vCard & more. Add a logo, pick a frame, download PNG/SVG/JPG. Free, no watermark, no signup.
LLM API Cost Calculator
Compare LLM API pricing across 18 models GPT-4o, Claude Sonnet 4, Gemini 2.5 Pro, DeepSeek, Mistral and more. Calculate monthly API costs, count tokens live, and convert to 7 currencies. Free, instant, no signup.
PX to EM Converter
Convert pixels to em and em to px with customizable parent font size. Free, instant, local calculation, copy-ready CSS snippets & Tailwind classes.